How Long Do Dermal Fillers Last and What to Expect From Your Results
Last updated: June 25, 2026 Content developed with input from NV Med Center’s team to reflect clinic-specific information about dermal filler consultations, treatment planning, and patient guidance. If you are wondering how long dermal fillers last, many hyaluronic acid filler results remain visible for about six months to a year. Some products, treatment areas, and patients may experience results that last longer. Dermal filler duration depends on the exact product, treatment area, amount used, injection depth, technique, facial anatomy, and individual response. The result usually fades gradually rather than disappearing on one specific date. For patients in North Vancouver, understanding the expected timeline, possible side effects, maintenance needs, and urgent warning signs can support a safer and more informed treatment decision. Medical disclaimer: This article provides general educational information and does not replace medical advice. A qualified healthcare professional must assess your medical history, facial anatomy, treatment suitability, and individual risks before recommending dermal filler treatment. Quick Summary Question Direct answer How long do dermal fillers last? Many hyaluronic acid fillers last about six months to a year, although some may remain visible longer. Do all fillers last the same amount of time? No. Duration varies by product, treatment area, amount, technique, anatomy, and individual response. Do lip fillers last less than cheek fillers? They often do, but the exact timeline depends on the product and patient. When should fillers be maintained? Maintenance should follow an individual reassessment rather than a fixed schedule. Can fillers be dissolved? Hyaluronidase may be used to dissolve hyaluronic acid fillers only. Are dermal fillers risk-free? No. Temporary side effects are common, and rare but serious complications can occur. How Long Do Hyaluronic Acid Dermal Fillers Last? Hyaluronic acid fillers often remain visible for several months. Some people notice gradual fading around six months, while others continue to see results for a year or longer. These estimates should not be treated as guaranteed timelines. Current Health Canada guidance on cosmetic injections states that hyaluronic acid filler effects may last from six months to a year or more. The American Academy of Dermatology’s filler guidance provides a general estimate of four to twelve months for hyaluronic acid gel. However, the expected duration should always be discussed using the exact product recommended for the patient and treatment area. Estimated Results by Treatment Area Treatment area General expectation Lips Results often remain visible for several months. Lip movement and the use of softer formulations may contribute to a shorter result. Cheeks Results may remain visible longer than lip filler, depending on the product, injection depth, anatomy, and treatment goal. Chin and jawline Duration varies according to product selection, amount used, placement, facial structure, and level of correction. Nasolabial folds Results depend on facial movement, treatment depth, product formulation, and individual response. No general duration estimate is provided for under-eye filler. This area requires careful assessment because anatomy, skin quality, swelling, previous treatment, and product placement can affect both suitability and risk. Under-eye filler is not appropriate for every patient. What Are Dermal Fillers? Dermal fillers are injectable treatments used to restore selected areas of volume, support facial contours, and soften certain lines and folds. Many temporary facial fillers are made with hyaluronic acid, a substance naturally found in the body that attracts and retains moisture. Different formulations are designed with varying levels of firmness and flexibility to suit particular facial areas. Dermal fillers may be considered for goals such as: Adding or shaping lip volume Supporting cheek contours Improving chin or jawline definition Restoring selected areas of facial volume Softening certain facial folds Improving facial balance A filler that is suitable for the cheeks may not be suitable for the lips or another treatment area. The clinician should select the product based on the patient’s anatomy, treatment goals, medical history, and the approved use of the product. Patients can confirm whether the proposed product has an active Canadian medical device licence through Health Canada’s Medical Devices Active Licence Listing. Hyaluronic Acid Fillers and Collagen-Stimulating Treatments Are Different Hyaluronic acid fillers and collagen-stimulating injectable treatments should not be given the same results timeline. The hyaluronic acid fillers place a gel beneath the skin to add volume or support. A visible change may appear immediately, although swelling can affect the early appearance. Collagen-stimulating treatments work more gradually. Their visible effects may develop over several weeks or months as the tissues respond to treatment. They may also require a planned series of appointments rather than one immediate correction. The two categories also differ in reversibility. Hyaluronidase may be used to break down hyaluronic acid filler in selected situations, but it does not dissolve collagen-stimulating products. Because these treatments work differently, patients should ask which category is being recommended, how the result is expected to develop, and what options are available if they are unhappy with the outcome. What Affects Dermal Filler Longevity? Several connected factors influence how long dermal filler results remain visible. Even two patients treated in the same area may experience different timelines. The Exact Product Hyaluronic acid fillers vary in firmness, flexibility, concentration, and intended placement. A softer product designed for a highly mobile area may behave differently from a firmer formulation used for structural support. The Treatment Area The lips move frequently during speaking, eating, drinking, and facial expressions. The cheeks, chin, and jawline have different movement patterns and may require another formulation, placement depth, or treatment approach. Movement may influence how long the result remains noticeable, but it is only one part of the treatment timeline. Injection Depth and Technique The filler must be placed at a depth and location suited to the patient’s anatomy and treatment goal. Injector knowledge of facial anatomy and blood vessel locations also plays an important role in safety. Amount of Product Using more filler does not automatically create a longer-lasting or better result. The amount should be selected according to the treatment area, existing volume, facial
Botox for Beginners: What First-Time Patients Should Know

Considering Botox for the first time can feel overwhelming. Many people have questions about safety, results, side effects, and what actually happens during treatment. This Botox guide for first-time patients explains the basics in simple terms so you can feel more prepared before booking a consultation. Botox is a prescription cosmetic injection, so the safest first step is a medical consultation. At NV Med Center, first-time patients in North Vancouver can discuss their goals, medical history, facial movement, and treatment options before deciding whether Botox treatment is right for them. What Is Botox and How Does It Work? Botox Cosmetic is a brand name for an injectable medicine called onabotulinumtoxinA. It is one type of botulinum toxin product, but “Botox” is not the general name for every anti-wrinkle injectable. In Canada, injectable products should be authorized for sale by Health Canada and used under proper medical guidance. Botox works by relaxing selected facial muscles. These muscles create dynamic wrinkles, which are lines that appear or deepen when you frown, raise your eyebrows, smile, or squint. Botox is commonly used as a wrinkle treatment for: Forehead lines Frown lines between the eyebrows Crow’s feet around the eyes Botox may help soften dynamic lines and reduce repeated muscle movement in treated areas. It should not be presented as a guaranteed way to prevent wrinkles, because results vary by patient, treatment area, anatomy, and lifestyle. Understanding Botox Basics for Beginners The most important Botox basics are simple: Botox is temporary, results are gradual, and treatment should be personalized. A good first-time Botox plan focuses on your natural facial movement instead of making your face look frozen. During consultation, your provider may ask you to smile, frown, squint, or raise your eyebrows. This helps them understand how your muscles move and where cosmetic injections may be appropriate. For beginners, a conservative approach is often preferred. Units and placement are individualized based on facial anatomy, muscle activity, treatment goals, and provider assessment. Botox vs Dermal Fillers Botox and dermal fillers are both cosmetic injections, but they serve different purposes. A Botox temporarily relaxes targeted muscles that contribute to dynamic wrinkles, while dermal fillers add or restore volume in areas such as the lips, cheeks, and facial folds. The right treatment depends on your concerns, facial anatomy, and aesthetic goals. Some patients benefit from Botox alone, while others may be better candidates for fillers or a combination approach. If you are comparing both options, NV Med Center’s Botox and fillers guide explains the key differences in more detail. Who May Be Suitable for First-Time Botox? Botox may be suitable for adults who want to soften dynamic facial lines and are medically appropriate for treatment after assessment. Suitability depends on your health history, current medications, facial anatomy, treatment goals, and expectations. A consultation should include a review of: Your medical history Current medications and supplements Previous cosmetic procedures Skin or muscle concerns Whether you are pregnant or breastfeeding Desired results Questions about safety and side effects Botox may not be recommended for everyone. Your provider should review product-specific guidance if you are pregnant or breastfeeding, have certain neurological conditions, have an active skin infection near the treatment area, or have a known allergy to ingredients in the product. What Happens During Your First Botox Appointment? A first-time Botox appointment usually includes more than the injection process. The injections may be quick, but your first visit can take longer because it includes consultation, facial assessment, treatment planning, consent, and aftercare instructions. Step 1: Consultation Your provider reviews your health history, goals, medications, allergies, and previous cosmetic procedures. This is also the right time to ask questions about Botox safety info, expected results, side effects, and follow-up support. Many first-time patients feel more comfortable when they know what will happen before they arrive. If you are preparing for your first cosmetic treatment, a guide on preparing for your first skin rejuvenation appointment explains what to bring, how consultations typically work, and what questions you may want to ask during your visit. Step 2: Facial Assessment Your provider evaluates facial movement and symmetry. You may be asked to frown, smile, squint, or raise your brows. This helps identify which muscles are involved and whether Botox is appropriate for your concerns. Step 3: Treatment Planning Your treatment plan should be based on your anatomy, muscle strength, goals, and desired level of movement. First-time Botox patients often prefer subtle results, so your provider may discuss a conservative plan and explain what can be adjusted at future visits. Step 4: Injection Process The injection process usually takes only a few minutes once the plan is confirmed. Most patients describe the feeling as a quick pinch. Discomfort is usually brief, and many people return to normal daily activities after their visit. Step 5: Aftercare Instructions Before you leave, your provider should explain what to expect, what to avoid, and when to seek help. Aftercare instructions may vary based on the treatment area, product, provider technique, and your medical history. Botox Preparation Before Your Appointment Botox preparation should focus on safety and clear communication. Do not stop prescription medications, blood thinners, or supplements on your own. If you take any medication or supplement that may affect bruising or treatment safety, discuss it with your provider before making changes. Before your appointment, your provider may ask you to: Arrive with clean skin if advised Share your medication and supplement list Tell them about allergies or recent illnesses Discuss pregnancy or breastfeeding if relevant Avoid alcohol only if they recommend it Ask what results are realistic for your face Preparation is not about following a generic checklist. It is about giving your provider the right information so they can decide whether treatment is safe and appropriate. Botox Aftercare: What to Expect After Treatment Aftercare instructions should come from your provider because recommendations can vary. Some patients may
Lip Filler vs “Gel” Filler: What’s the Difference and What’s Best for You? (Vancouver)
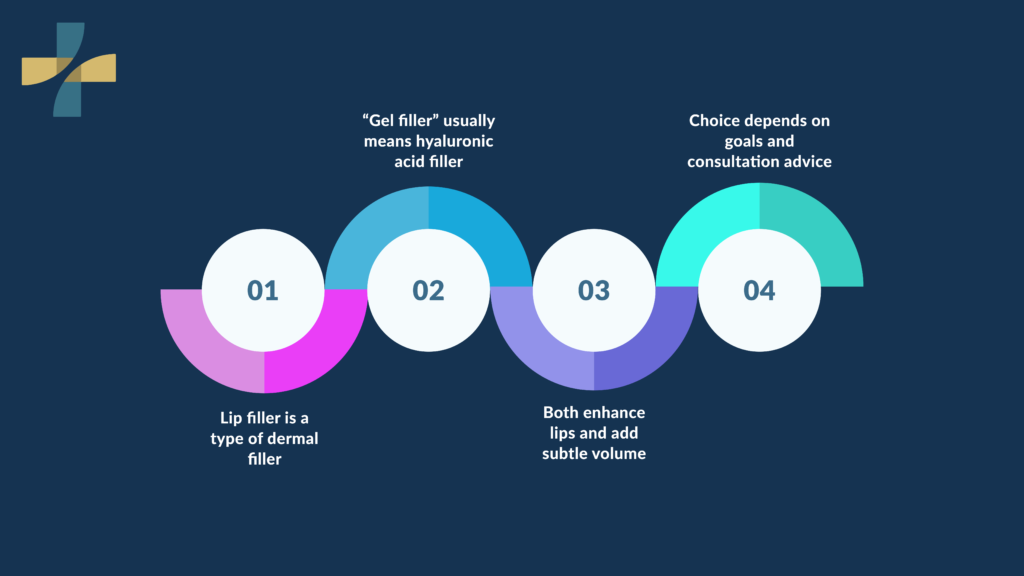
Searches for lip filler vs dermal filler have increased as more people look for subtle lip enhancement instead of dramatic changes. Social media trends from public figures like Kylie Jenner have increased awareness, but they have also created confusion around terms like “gel filler.” Many patients are unsure if lip fillers are different from dermal fillers or if “gel filler” is something separate. This guide explains what these terms actually mean, how hyaluronic acid lip filler works, and how to choose the right treatment. It also covers safety, results, and what to expect so you can make a clear decision before booking a lip filler consultation in Vancouver. Is “gel filler” the same as Dermal Filler? Gel filler is not a separate treatment. It is a general term used to describe most dermal fillers, which are gel-based substances injected under the skin. In practice, lip fillers and facial fillers are both types of gel-based dermal fillers used for different areas. Most modern fillers are made as smooth gels so they can be placed precisely under the skin. This includes HA filler products used for lips, cheeks, and other areas. The term “gel filler” is often used in marketing or social media, which leads many people to think it is a different category. What “gel-based filler” actually means A soft gel substance injected under the skin Designed to add volume and shape Includes hyaluronic acid lip filler and other materials Not a different treatment type Why does the term cause confusion Used loosely in clinics and online Not a medical classification Often misunderstood by patients Clear point: all lip fillers are dermal fillers, but not all dermal fillers are used for lips. Are Lip Fillers a Type of Dermal Filler? Yes, lip fillers are a type of dermal filler designed specifically for the lips. They are usually made from hyaluronic acid and are formulated to be softer and more flexible, so they move naturally with speech and facial expression. Lip tissue moves constantly. This requires a different formulation compared to fillers used in the cheeks or jawline. Lip filler gel technology focuses on flexibility, hydration, and smooth integration into the tissue. How lip fillers are designed differently Softer consistency than other fillers Designed for movement and compression Allows subtle enhancement rather than stiffness Common goals of lip filler treatment Lip augmentation and volume Smoother lip lines Improved symmetry Better hydration and shape Many patients today prefer natural results. The goal is not oversized lips but balanced proportions that match the face. What is the Difference Between Lip Filler vs Dermal Filler? The main difference between lip filler and dermal filler is the treatment area and formulation. Lip fillers are used only for lips and are softer, while dermal fillers are used across the face and vary in thickness depending on the area. Dermal fillers are used to restore structure and support, while lip fillers focus on movement and detail. Comparison table Feature Lip Fillers Dermal Fillers Purpose Lip enhancement Volume restoration and contour Areas Lips only Cheeks, jawline, chin, folds Texture Soft and flexible Varies from soft to firm Movement High flexibility Depends on the area Duration 6–12 months 9–24 months Example scenarios Patient wants fuller lips → lip filler Patient wants cheek definition → dermal filler Patient wants both balance and volume → combination treatment This is where consultation matters. A provider chooses the right product based on anatomy, not just preference. How Does Lip Filler Gel Technology Actually Work? Lip filler gel technology uses hyaluronic acid to add volume and attract water under the skin. This allows controlled shaping while keeping the lips soft and natural in feel. Hyaluronic acid occurs naturally in the body. It binds water and supports tissue hydration. This is why HA fillers are widely used for lip augmentation. What is hyaluronic acid lip filler A naturally occurring substance Helps retain moisture Provides smooth, controlled volume Can be reversed if needed Why do different gels behave differently Cross-linking affects firmness Injection depth changes the results Product selection affects longevity One key advantage is reversibility. If needed, dissolving filler using hyaluronidase can adjust or remove the result. Which Option Gives More Natural Results and Better Longevity? Lip fillers can provide natural results when the right product and technique are used. They usually last 6 to 12 months, while dermal fillers in other areas may last longer due to thicker formulas and less movement. The lips break down filler faster because of constant movement. This is why maintenance treatments are common. What affects natural results Injector skill Product choice Amount injected Lip structure How long do lip fillers last Average: 6–12 months Faster breakdown than facial fillers Maintenance needed for consistency According to data from the American Board of Cosmetic Surgery, most HA fillers last between 6 months and 2 years, depending on location and formulation. What is the Typical Lip Filler Swelling Timeline and Recovery? Lip filler swelling usually peaks within 24 to 48 hours and improves over several days. Most patients see stable results within one to two weeks as the filler settles and integrates into the tissue. Swelling is a normal part of healing. Understanding the lip filler swelling timeline helps reduce concern during recovery. Typical timeline Day 1–2: swelling and tenderness Day 3–5: swelling reduces Day 7–14: shape settles What is normal Mild bruising, slight unevenness early on, and temporary firmness are common after lip filler treatment. These effects usually settle within one to two weeks as the filler integrates and swelling reduces. When to seek help Severe pain, skin discolouration, or unusual swelling are not typical and should be assessed as soon as possible. These signs may indicate a complication that requires prompt medical attention. What are the Safety Risks of Lip Fillers and How are They Managed? Lip filler safety risks are low
Botox & Dermal Fillers in Vancouver: Step-by-Step Process (Consultation to Aftercare)
If you are thinking about Botox and fillers in Vancouver, you likely want clear answers before booking. Most patients ask the same questions. What happens during the appointment, will it hurt, and what does recovery look like? Demand for non-surgical treatments continues to grow. According to the American Society of Plastic Surgeons, millions of Botox and filler treatments are performed each year. Public figures like Kim Kardashian have also increased awareness of injectables, but real value comes from understanding the process, not trends. This guide explains what to expect from Botox and fillers from start to finish. It covers preparation, the Botox consultation process, dermal filler injection steps, aftercare, and results. The goal is simple. Help you make a clear and confident decision. What Are Botox and Dermal Fillers, and How Do They Work? Botox and dermal fillers are non-surgical injectables used to reduce wrinkles and restore facial volume. Botox relaxes muscles that cause lines, while fillers add structure under the skin. Both are planned during an injectable consultation based on your facial assessment and goals. Botox and dermal fillers are among the most widely used non-surgical treatments today. Global data shows over 7.8 million Botox treatments and 6.3 million dermal filler procedures are performed each year, reflecting strong demand for treatments with predictable results and minimal downtime. Botox works by blocking signals between nerves and muscles, which reduces movement in targeted areas. Dermal fillers, often made of hyaluronic acid, restore volume in areas such as cheeks, lips, and jawline. Botox vs fillers: key differences Treatment Purpose Common Areas Duration Botox Reduce muscle movement Forehead, frown lines, crow’s feet 3–4 months Fillers Add volume and shape Cheeks, lips, jawline 6–18 months Why patients choose injectables Patients choose injectables because appointments are quick, often completed within minutes, with little to no downtime afterward. Most people can return to daily activities the same day, and results develop gradually, helping achieve natural-looking results without sudden or obvious changes. What Should You Do Before a Botox or Filler Appointment? Preparation for Botox and fillers involves avoiding alcohol, blood thinners, and certain skincare products before your appointment. You should also reschedule if you have skin irritation or illness. Proper preparation helps reduce swelling/bruising and supports better safety and expectations. What to avoid before injections Alcohol for 24 hours NSAIDs or blood thinners Retinol or strong skincare Intense exercise When to reschedule your appointment You should reschedule your appointment if you have active acne, a rash, cold sores, or any infection or illness. Treating the skin while it is irritated or compromised can increase the risk of complications and affect your results. Tips to reduce bruising and swelling Stay hydrated Sleep well before treatment Eat balanced meals These steps support before and aftercare outcomes and reduce recovery time. What Happens During the Botox Consultation Process and Facial Assessment? The Botox consultation process includes a facial assessment, medical review, and discussion of your goals. Your provider builds a treatment plan based on muscle movement, skin condition, and desired outcome. This step sets clear safety and expectations before treatment begins. What is evaluated during consultation During your consultation, your provider evaluates facial symmetry, muscle activity, and skin texture to understand how your face moves and how your skin responds. This assessment helps guide a treatment plan that supports balanced, natural-looking results. How is your treatment plan created Your treatment plan is created by identifying the exact injection areas, determining the appropriate dosage or filler volume, and setting a realistic timeline for results. This approach helps align the treatment with your goals while supporting safe, balanced, and natural-looking outcomes. Questions to ask during consultation How long do fillers last? What is the Botox aftercare timeline? Will swelling or bruising occur? This stage ensures your anti-aging plan fits your needs. What Happens During Botox and Dermal Filler Injection Steps? Botox appointment steps and dermal filler injection steps include cleansing the skin, marking areas, and injecting with a fine needle. The process usually takes 15 to 30 minutes. Most patients feel mild pressure or a brief pinch during treatment. Step-by-step treatment process Skin is cleaned Treatment areas are marked Optional numbing applied Injections are performed Results reviewed What injections feel like Injections usually feel like a light pinching sensation with brief pressure at the treatment site. Most patients describe the discomfort as minimal and short-lasting, making the procedure easy to tolerate without significant pain. Appointment timing Appointment timing is typically short, with Botox treatments often taking 10 to 20 minutes and dermal fillers taking about 20 to 30 minutes, depending on the areas treated. This makes both options easy to fit into a regular schedule. The process is quick and designed to fit into a normal day. What Should You Expect Immediately After Botox or fillers? After Botox or fillers, mild swelling, redness, or bruising may appear at injection sites. These effects are temporary and usually settle within a few days. Knowing this early recovery stage helps set realistic expectations and reduces concern. Common reactions Common reactions after treatment include redness, mild swelling, and bruising at the injection sites. These effects are temporary and usually improve within a few days as the skin settles. Less common symptoms Less common symptoms may include tenderness or slight asymmetry early on as the product settles. These changes often resolve as healing progresses and results become more stable. When to contact your provider You should contact your provider if you experience severe pain, vision changes, or unusual swelling. These symptoms are rare but require prompt evaluation to rule out complications. These are rare but should be reviewed promptly. What Is The Proper Botox and Dermal Filler Aftercare Timeline? The Botox aftercare timeline and dermal filler aftercare focus on avoiding pressure, heat, and activity for a short period. Following aftercare steps helps prevent migration, reduces swelling/bruising, and supports stable results.
Botox & Dermal Fillers in Vancouver: 5 Reasons to Choose NVMed Center
Interest in Botox and fillers in Vancouver continues to grow as more people choose non-surgical facial rejuvenation over invasive procedures. According to the American Society of Plastic Surgeons, over 28.5 million minimally invasive treatments were performed in 2024, including nearly 9.9 million neuromodulator injections like Botox and over 5.3 million hyaluronic acid filler treatments. These numbers show that cosmetic injectables remain one of the most common anti-aging treatment options today. Many patients are now comparing clinics based on safety, results, and pricing. Some want wrinkle reduction solutions for early signs of ageing. Others want lip enhancement or facial contouring. Most share the same concern: finding a provider they can trust. This guide explains why NV Med Center stands out as a reliable choice. You will learn what affects results, how safety is managed, and what to expect before booking a Botox consultation. Vancouver patients can feel confident about. Why is NVMed Center a Trusted Choice for Botox and Fillers in Vancouver? NVMed Center is a trusted choice for Botox and filler in Vancouver because treatments are delivered in a medical setting with trained providers, structured assessments, and clear patient guidance. The clinic focuses on natural outcomes, safety protocols, and personalised plans that match each patient’s facial structure and goals. Medical setting vs cosmetic-only clinics Many clinics offer cosmetic injectables, but not all operate within a medical framework. NV Med Center provides treatments under medical supervision. This reduces risks and supports better outcomes. Patients often prefer this model when comparing providers. It offers: Clinical oversight Safer injection practices Clear follow-up support Personalised treatment planning Each face responds differently to anti-wrinkle injections and dermal fillers. NV Med Center builds treatment plans based on: Facial muscle movement Skin condition Desired results Example: A patient may need small Botox adjustments rather than full treatment. Another may benefit more from dermal fillers in Vancouver to restore volume. Focus on natural results Many patients worry about a frozen look. NV Med Center focuses on balance and subtle improvement. A typical Botox before and after result should show: Softer lines Preserved facial expression No obvious signs of treatment What Makes Botox and Dermal Fillers Safe at NVMed Center? Botox and dermal fillers are safe when performed by trained professionals using approved products and correct techniques. NVMed Center follows medical protocols, uses Health Canada-approved injectables, and conducts detailed consultations to reduce risk and improve treatment precision. Are dermal fillers safe? Dermal fillers are safe when administered by trained medical professionals using approved products and proper techniques. According to FDA guidance on dermal fillers, these treatments are regulated and should only be performed by qualified providers to reduce risks and complications. Common side effects may include mild swelling or bruising. More serious complications are rare but can occur when injections are done incorrectly. This is why choosing a medical clinic with proper assessment and technique is important for safe outcomes. NV Med Center reduces these risks through structured assessments and controlled techniques. Approved products and techniques The clinic uses products such as: Botox and Dysport for anti-wrinkle injections Juvederm and Restylane for dermal fillers These are widely used and meet strict safety standards. Injection techniques also matter. Providers may use: Fine needles for precision Cannulas to reduce bruising Consultation-first approach A Botox consultation for Vancouver patients attending at NV Med Center includes: Medical history review Facial analysis Discussion of goals Example: A first-time patient concerned about safety receives a step-by-step explanation before treatment. How Do Botox and Fillers Improve Facial Appearance Naturally? Botox and dermal fillers improve facial appearance by relaxing targeted muscles and restoring volume in key areas. This reduces wrinkles, enhances facial structure, and supports natural movement without creating an over-treated look when performed correctly. Anti-wrinkle injections use cases Botox targets muscle activity. Common treatment areas include: Forehead lines Crow’s feet Frown lines These are common wrinkle reduction solutions for early ageing signs. Dermal fillers Vancouver use cases Fillers restore volume and shape. Common areas: Lip filler Vancouver treatments for lip enhancement Cheeks for lift and balance Jawline for facial contouring Non-surgical facial rejuvenation benefits Compared to surgery, cosmetic injectables offer: Minimal downtime Fast treatment sessions Adjustable results Example scenario: A patient preparing for a major event may choose lip enhancement and light Botox. The goal is to look refreshed without visible signs of treatment. How Long Does Botox Last, and What Results Should You Expect? Botox typically lasts between 3 and 6 months, while dermal fillers can last from 6 to 18 months, depending on the area treated. Results appear gradually for Botox and immediately for fillers, with subtle improvements rather than dramatic changes. Treatment timeline overview Treatment Type Onset Time Duration Botox 3 to 10 days 3 to 6 months Dermal Fillers Immediate 6 to 18 months How long does Botox last Botox results vary based on: Muscle strength Treatment area Dosage Maintenance is needed to keep results consistent. Filler longevity Different areas respond differently: Lips: shorter duration Cheeks and jawline: longer duration Botox before and after expectations Patients should expect: Gradual improvement Natural movement retained No sudden or extreme changes What is the Cost of Botox and Filler in Vancouver, and What Affects Pricing? Botox cost in Vancouver is usually calculated per unit, while dermal fillers are priced per syringe. Total cost depends on treatment area, product used, and the amount required to achieve balanced and natural results. Botox cost breakdown in Vancouver Typical pricing model: Charged per unit Total depends on the area treated Example: Forehead: moderate units Full upper face: higher units Dermal filler pricing Fillers are priced per syringe. Cost varies based on: Area treated Product type Volume needed Factors that affect cost Provider experience Product quality Complexity of treatment Value vs price Lower-cost treatments may lead to poor results or require correction. A medical clinic approach focuses on long-term value rather than
Microneedling vs Microdermabrasion: Differences, Results & Which Is Right for You in Vancouver
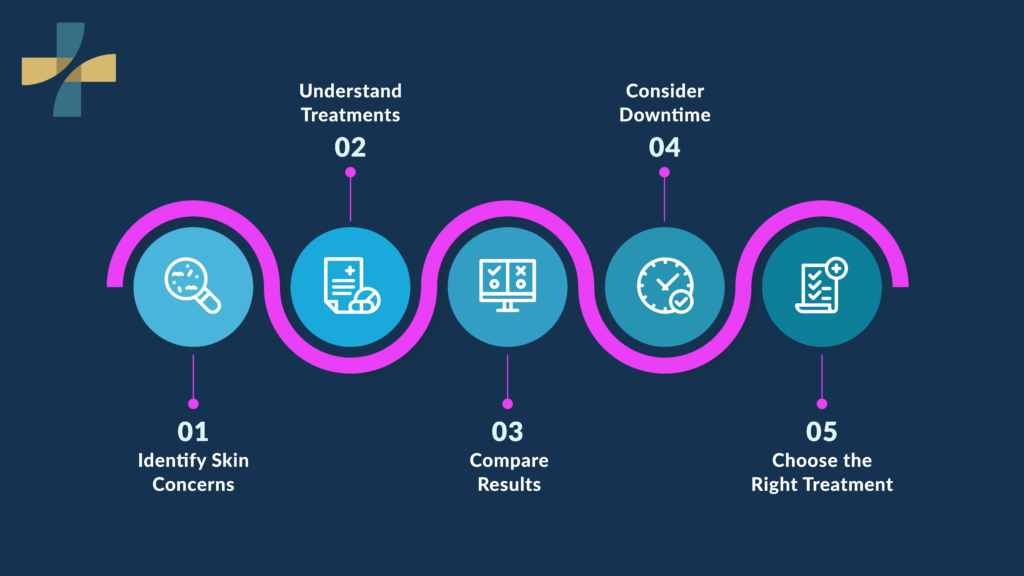
If you are comparing microneedling vs microdermabrasion, you are likely trying to solve a real skin concern without wasting time or money on the wrong treatment. Many adults in Vancouver want help with acne scars, fine lines, enlarged pores, or rough skin texture, but the difference between these two treatments is not always clear. Interest in lower-downtime skin treatments continues to rise as more people seek non-surgical anti-aging options that fit work and social schedules. That is also why treatments focused on skin repair and collagen support keep appearing in mainstream beauty coverage. Recent trend reporting from Vogue Business highlighted growing consumer interest in regeneration-focused skincare, including liquid microneedling-inspired products, which reflects broader demand for treatments that support texture and skin renewal. But in-clinic care still matters more than trends, especially when you are deciding between surface exfoliation and deeper collagen induction therapy. This guide explains what each treatment does, how results differ, what downtime may look like, and which option may suit your goals best. It is built for decision-stage readers who want a practical skin rejuvenation comparison, not generic beauty advice. What Is the Difference Between Microneedling and Microdermabrasion? The difference between microneedling and microdermabrasion is that microneedling works below the skin’s surface to support collagen production, while microdermabrasion exfoliates the outer layer of skin. Microneedling is often better for deeper texture concerns, while microdermabrasion is usually better for surface refresh and brightness. Microneedling and microdermabrasion are both non-surgical skin treatments, but they do not work in the same way. That is the most important point to understand before you book. One aims to trigger a repair response in the skin. The other aims to remove dull surface cells and improve how the skin looks and feels right away. What is Microneedling Microneedling is often described as collagen induction therapy. A device with very fine needles creates controlled micro-injuries in the skin. These tiny channels trigger the skin’s repair process, which can help improve acne scars, fine lines, enlarged pores, and uneven skin texture over time. This is why microneedling is often grouped with longer-term skin resurfacing strategies rather than simple facial-style exfoliation. What is Microdermabrasion Microdermabrasion works at the surface. It uses a device to exfoliate dead skin cells from the outer layer of skin. That makes it a better fit for people whose main concern is dullness, roughness, mild congestion, or a quick skin refresh before an event. Simply put, microdermabrasion polishes the surface, while microneedling aims deeper. A simple way to think about it is this. If your main issue sits on the top layer of the skin, microdermabrasion may make more sense. If your main issue involves texture changes below the surface, microneedling may be the stronger option. Mini scenario: A patient has dry-looking skin and wants a brighter look before a wedding in ten days. Surface exfoliation may fit that goal better. Another patient has acne scars from several years ago and wants a gradual texture change. Microneedling may be more suitable for that concern. Quick comparison table Feature Microdermabrasion Microneedling Main action Surface exfoliation Controlled micro-injury to trigger repair Treatment depth Outer skin layer Deeper layers beneath the surface Best for Dull skin, rough texture, mild congestion Acne scars, fine lines, enlarged pores, uneven texture Result timing Often faster visible glow Slower, more gradual change Downtime Little to no Mild to moderate, often a few days Sessions Often, more frequent upkeep Often fewer sessions for deeper goals Comfort Usually mild May involve more discomfort Goal type Quick refresh Longer-term skin remodelling Which Treatment is Better for Acne Scars, Fine Lines, Pores, and Dull Skin? When people search for the best treatment for acne scars, they are often really asking a bigger question: which treatment matches my actual problem? Microneedling is usually better for acne scars, fine lines, enlarged pores, and deeper texture concerns. Microdermabrasion is often better for dull skin, rough surface texture, and people who want a quick refresh with little recovery. The right choice depends on how deep the concern is and how fast you want results. Microneedling may fit better for: Acne scars Fine lines Enlarged pores Uneven skin texture Early signs of skin laxity Longer-term collagen support Microdermabrasion may fit better for: Dull or tired-looking skin Mild roughness Surface congestion Temporary brightness goals Quick refresh before an event Maintenance-focused skin smoothing Microneedling is often stronger for acne scars because it supports collagen remodelling beneath the surface. A review in PubMed reported that microneedling showed improvement in atrophic facial acne scars with a favourable safety profile across studies, supporting its role as a treatment option for scar-related texture concerns. That does not mean every scar responds the same way. Rolling scars, boxcar scars, and pigmentation can behave differently, which is why a consultation matters. Microdermabrasion can still help some people with post-acne marks, mild roughness, or a dull complexion, but it is usually not the first choice when scars are indented or long-standing. Mini scenario: A reader has visible pitted marks on both cheeks from breakouts during university. They are less worried about glow and more worried about texture in daylight. Microneedling is usually the stronger direction. Another reader feels their skin looks flat and rough after a stressful month, but they do not have deep scarring. Microdermabrasion may be enough to improve brightness and smoothness. For fine lines and enlarged pores, microneedling often has an edge because collagen support can improve how the skin looks over time. Microdermabrasion may still make skin feel smoother after treatment, but the change is often more surface-level and may fade faster. Which Treatment Has More Downtime and Recovery? Microneedling usually has more downtime than microdermabrasion because it triggers a deeper skin repair response. Microdermabrasion often has little to no downtime, while microneedling can leave skin red, tight, or flaky for several days, depending on treatment depth and skin sensitivity. For many people, the choice comes down to calendar
Scalp Microneedling for Hair Loss in Vancouver: Results, Timeline, and What to Expect
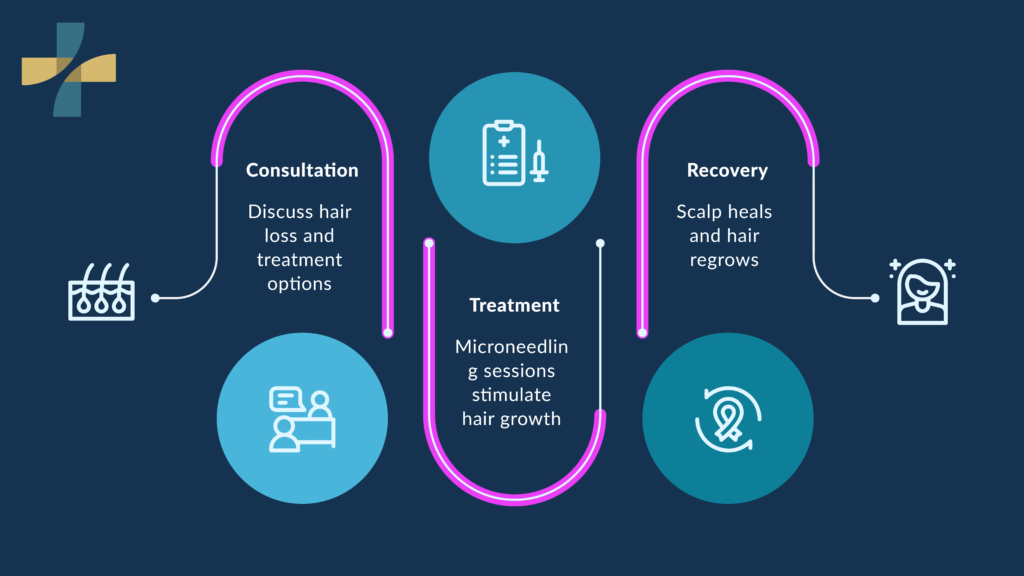
Hair thinning can feel slow at first, then suddenly hard to ignore. A wider part, more strands in the shower, or less volume at the crown can affect confidence and push people to look for non-surgical options. If you are searching for scalp microneedling in Vancouver, you likely want clear answers on who it may help, how long results can take, and what recovery is like. This guide explains the treatment in plain language, stays focused on hair loss only, and shows when it makes sense to book a hair loss consultation Vancouver patients can trust. What is Scalp Microneedling and How Does it Work for Hair Loss? Scalp microneedling in Vancouver is a treatment that uses very small needles to create controlled micro-injuries in the scalp. These tiny channels may support follicle stimulation, trigger a wound-healing cascade, and improve how the scalp responds to hair growth treatments. The goal is not to damage the scalp. The goal is to create a measured repair response. When the scalp repairs itself, blood flow, signalling proteins, and local healing activity can rise in the treated area. That is why microneedling for hair growth gets so much attention in hair restoration discussions. This topic has also become more visible in public conversation. Mainstream medical publishers, clinics, and consumer brands now talk about microneedling, PRP, and other hair restoration options more often than they did a few years ago. That trend has made more people aware of treatment options, but it has also created confusion about what microneedling can and cannot do. For pattern hair loss, the treatment is usually discussed as support for active follicles, not as a fix for long-standing smooth bald areas. Research in PubMed found that microneedling, especially when combined with other therapies, showed improvement in hair density and hair diameter in androgenetic alopecia studies. A simple example helps. A person in Vancouver notices that their part line is getting wider and their ponytail feels thinner than it did last year. That person may still have active follicles that are underperforming. In that setting, scalp treatment may be worth discussing with a provider. What the treatment aims to do Treatment goal What it means in plain language Follicle stimulation Encouraging weaker follicles to become more active Wound-healing cascade Triggering a repair response after controlled micro-injury Better topical support Creating short-term channels that may improve product contact Scalp health support Improving the local environment around active follicles Who is a Good Candidate for Scalp Microneedling in Vancouver? The best candidates for scalp microneedling at Vancouver clinics are adults with early to moderate thinning hair, pattern hair loss, or some forms of shedding where follicles are still active. It tends to be less helpful when follicles are no longer functioning or when the cause of hair loss needs a different medical plan. The most common reason people ask about this treatment is microneedling for androgenetic alopecia. This is the medical term for male and female pattern hair loss. It often shows up as a widening part, recession at the temples, thinning at the crown, or lower overall volume. Research and clinic guidance both suggest that earlier treatment generally gives a better chance of improvement than waiting until the loss is advanced. What Other Types of Hair Loss May Be Reviewed? Scalp microneedling may also be reviewed for some cases of stress-related shedding, postpartum thinning, or traction-related hair loss. These cases still need a proper review because not every type of hair loss responds in the same way. A consultation matters because the scalp may need a diagnosis before any treatment plan makes sense. Who Should Book a Consultation Before Scalp Microneedling? A consultation is the right next step for people with early pattern hair loss, diffuse thinning, ongoing shedding, or changes in scalp health that need a closer look. It is also important for people who may not be good candidates, including those with scarring alopecia, active scalp infection, uncontrolled skin inflammation, frequent infections, healing concerns, or medical issues that slow recovery. A practical way to think about it is this: Early pattern hair loss often deserves a closer look Diffuse thinning may need both scalp treatment and medical review Long-standing smooth bald patches usually need a different discussion Good scalp health supports better treatment planning Realistic expectations matter from the start One Vancouver patient may have six months of a widening part and increased hair fall after stress. Another may have a shiny bald patch that has not changed for years. Those are not the same clinical picture, and they should not be treated like they are. What Does the Procedure Feel Like and What Happens at the Appointment? Scalp microneedling usually feels like fast, light pricks across the scalp. Comfort steps can be adjusted based on the treatment plan, the area being treated, and the patient’s pain tolerance. Most visits are short, and many patients return to normal tasks the same day. What Happens Before Scalp Microneedling Starts? Before treatment, the appointment should begin with a history and scalp review. The provider looks at the pattern of hair loss, how long it has been going on, whether there is active shedding, and whether there are signs that point to a different cause. What Happens During the Scalp Microneedling Procedure? During the session, a microneedling device is passed over the areas of concern. Readers often ask about scalp microneedling needle depth, but depth is not something patients should try to choose on their own. Published reviews show that treatment settings can vary, and the right depth depends on the treatment goal, the scalp, and the provider’s judgment. What Happens Right After the Procedure? Right after treatment, the scalp may look pink or red and feel warm or mildly tender. Some patients may have pinpoint bleeding during the session, especially when deeper settings are used. Most of these reactions settle over a short period. One patient may book a
Microneedling in Vancouver for Face & Scalp: Benefits, Process & Results
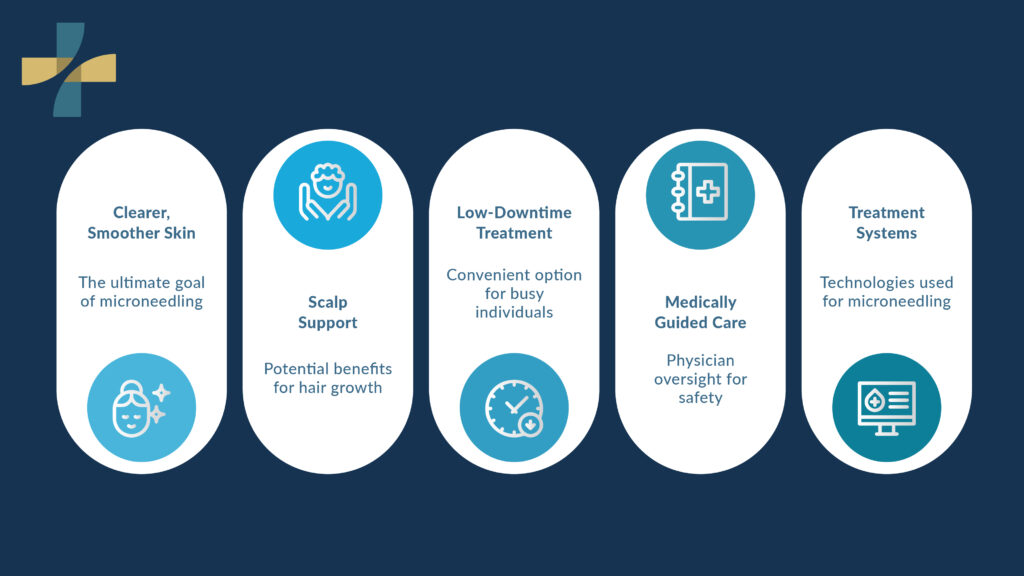
Many people searching for microneedling in Vancouver want clearer, smoother skin and honest answers about whether the treatment can also support the scalp. Interest in low-downtime, non-surgical treatments has grown as more patients look for options that fit their work, family, and social plans. Microneedling is usually discussed alongside Dermapen and RF microneedling systems, especially for concerns like acne scars, fine lines, enlarged pores, and collagen support. At NV Med Center, the focus is on medically guided care with physician oversight and tailored treatment planning. This guide explains how microneedling for face and scalp concerns works, what results may be realistic, and what recovery may involve. What is Microneedling, and How Does it Work? Microneedling is a minimally invasive treatment that uses very fine needles to create controlled micro-channels in the skin or scalp. These tiny channels trigger a repair response that supports collagen induction therapy, which may help improve acne scars, fine lines, enlarged pores, and some scalp concerns over time. The treatment works by creating small, precise injuries in the surface layers, which prompts the body to produce new collagen and elastin linked to firmer, smoother skin. This is why microneedling is often called collagen induction therapy. The goal is gradual skin remodelling over a series of treatments rather than trying to change texture or lines in one session. What happens during collagen induction therapy? A sterile microneedling device moves across the treatment area at a depth based on the skin zone and concern being treated, during collagen induction therapy. A session for general texture is usually more superficial than one focused on acne scars. The treatment creates controlled micro-channels that begin to close within minutes. Under the surface, the skin starts a healing response that supports new collagen and elastin, which is why patients may notice an early glow first and more gradual improvement over the following weeks. How is medical microneedling different from at-home rollers? Medical microneedling is different from at-home rollers because it uses sterile equipment, controlled depth, and a treatment plan guided by a trained provider. At-home rollers do not offer the same precision, so they may cause irritation or limited results, while a clinic-based treatment can be adjusted for skin sensitivity, acne scars, enlarged pores, or scalp goals. The American Academy of Dermatology advises checking with a dermatologist or medical doctor before using a microneedling device because it can worsen some hair conditions or skin issues. What Does Microneedling Treat on the Face? Microneedling for face concerns is most often used to improve acne scars, fine lines, enlarged pores, rough texture, and dull-looking skin. The treatment works best when expectations are realistic, because skin remodelling takes time, and most patients need a series rather than one visit. For many patients, the face is the main treatment area because it shows textural changes quickly. This may include shallow acne scars on the cheeks, early fine lines around the mouth, or enlarged pores that make makeup sit unevenly. Microneedling does not work like filler or wrinkle injections. It does not add volume or freeze movement. It supports texture and surface quality. Can microneedling help acne scars? Microneedling may help improve some acne scars by supporting new collagen in the treated skin. The AAD lists microneedling as a treatment that can help diminish acne scars, and several reviews describe it as a useful option for scar remodelling. It tends to work best for shallow to moderate textural scars, while deeper or mixed scar patterns may need a broader treatment plan. Patients should expect gradual improvement over a series of sessions rather than scar-free skin after one treatment. Can it improve fine lines and enlarged pores? Microneedling may improve fine lines and enlarged pores by supporting collagen and helping the skin surface appear firmer and more even. A common example is a patient in their late 30s who feels their skin looks rougher than it used to and notices early lines under makeup. Another is a younger patient with oily skin who wants pores to look less obvious in photos. In both cases, the aim is texture improvement, not a dramatic change in facial shape. Is microneedling for the face suitable for early ageing and rough texture? Microneedling for the face is often suitable for mild to moderate signs of early ageing and rough texture. It is a non-surgical option with short downtime that may help improve skin texture gradually, but the best results still depend on choosing the right patient and treatment plan. Can Microneedling Be Used on the Scalp for Thinning Hair? Microneedling for scalp care may support people with hair thinning by creating controlled stimulation across the scalp surface. Scalp microneedling for hair growth is usually framed as a supportive treatment, and results depend on the reason for the thinning and the overall treatment plan. How does microneedling for scalp support work? Microneedling for scalp support works by creating controlled micro-injuries that trigger a healing response and may help the scalp environment. Researchers continue to study how this may affect follicles and growth signals. Reviews have suggested that microneedling may improve hair parameters, especially when paired with other therapies, though mechanisms are still being studied. For a patient noticing mild thinning near the temples or crown, the treatment may be discussed as a way to support scalp stimulation. It is better to present it as supportive care than as a guaranteed regrowth treatment. What can scalp microneedling for hair growth realistically do? Scalp microneedling for hair growth may help support scalp health and may be used as part of a medically guided plan for hair thinning. Reviews on PubMed report improved hair parameters in many studies, especially when microneedling is paired with other therapies, but the evidence is stronger for diagnosed androgenetic alopecia than for every type of thinning. A realistic message is this: scalp microneedling may help selected patients, but it is not a stand-alone answer for every case of
Microneedling Benefits, Aftercare, and Cost Breakdown in Vancouver
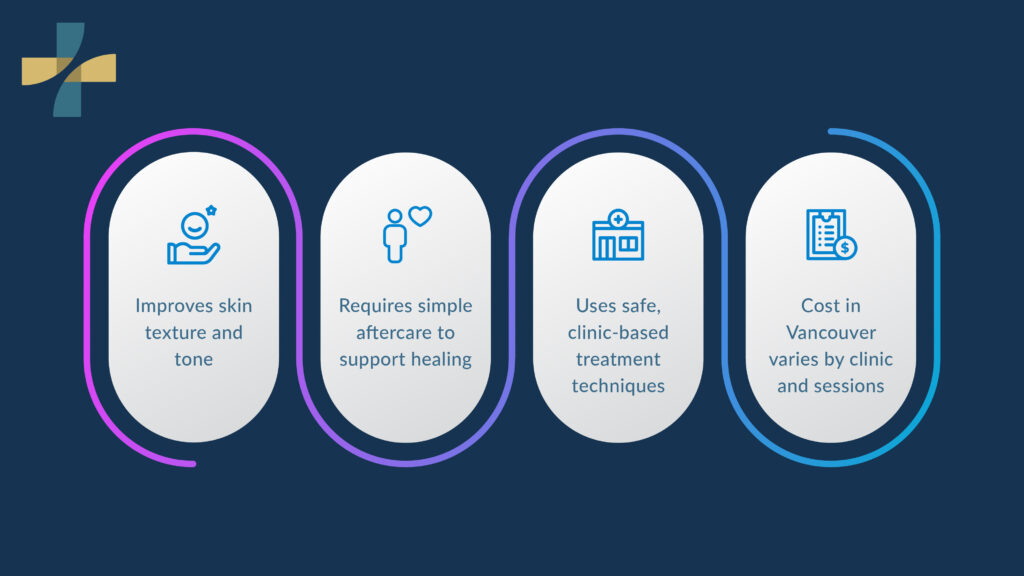
If you are comparing microneedling clinics, you are likely asking three things: What does it help with, what is the downtime, and what will it cost in Vancouver? Microneedling has seen increased demand as more patients look for clinic-based skin treatments with predictable outcomes. Skincare trend reporting for 2026 points to performance-led, clinic-based treatments and simpler routines that prioritise barrier health. That matters because microneedling results depend on smart settings, sterile technique, and calm aftercare, not hype. This guide covers micro needling benefits, micro needling aftercare, and microneedling cost in Vancouver so you can book with clear expectations. What Is Microneedling and How Does It Work Microneedling is a minimally invasive treatment that uses sterile, tiny needles to create controlled micro-channels in the skin. Your body responds by starting a repair process that can support collagen and elastin over time. Most sessions take around 30 minutes for the treatment step, plus time for numbing and setup. Microneedling is often called collagen induction therapy. In simple terms, a device stamps very small, precise punctures into the skin. These are not “random” holes. A trained provider selects depth, speed, and pattern based on your skin and the area being treated. Two common device types you will see in clinics: Pen devices (automated): Adjustable depth and speed for more control. RF microneedling: Adds radiofrequency energy to heat deeper layers while needles create channels. This is often used when firmness and texture are major goals. Mini-scenario: You want help with acne scars on your cheeks, but other areas of your face are more sensitive. Acne scars often need deeper needle penetration to support collagen repair, while thinner areas like the nose and under-eye region cannot tolerate the same depth. A trained provider adjusts the needle settings by area, using deeper treatment on scarred zones and lighter settings on sensitive skin to reduce risk. Top Micro Needling Benefits for Skin Rejuvenation Micro needling benefits come from controlled micro-injury that triggers a repair response in the skin. Over a series of sessions, many patients see smoother texture, softer acne scar edges, and a more even tone. Results vary by skin type, scar type, and aftercare. Here are the most common microneedling benefits patients ask about, with realistic expectations. 1) Texture and visible pores Microneedling can make skin feel smoother and look more even. Pores do not “close,” but when texture improves and skin support increases, pores often look less noticeable. Mini-scenario: Your makeup settles into texture around the nose and cheeks, which often points to uneven skin surface rather than a product issue. Texture can cause foundation to catch on rough areas and pores, making coverage look patchy. After a series of microneedling sessions and consistent aftercare, many patients notice smoother skin that allows makeup to sit more evenly. 2) Acne scars A well-known clinical trial in JAMA Dermatology found improvement in acne scar appearance after a series of needling treatments compared with a control area. Microneedling is often used for rolling and shallow boxcar scars. Very deep scars may need combo care (for example, subcision plus microneedling). A consult should cover this. 3) Fine lines and early creasing Microneedling is not the same as Botox. Botox relaxes muscle movement. Microneedling targets skin quality. Some patients combine both, spaced correctly. Brands like SkinPen and Dermapen helped make clinical microneedling mainstream in North America. They also pushed better standards around single-use needle cartridges and consistent device control. 4) Uneven tone and sun marks Microneedling can support tone by improving skin turnover and texture. If pigment is a main concern, your provider may recommend pairing microneedling with a pigment-safe plan and strict sunscreen use. 5) Stretch marks and body areas Microneedling is used beyond the face, including areas with stretch marks. Treatment plans vary based on skin thickness and sensitivity. Reality check on timelines Most people see early changes in glow and hydration within weeks, but collagen-related changes take longer. Some sources note continued collagen change over several months after a series. Simple “results curve” bar chart (typical patient experience) Week 1: Redness settles, skin feels tight Weeks 2 to 4: Texture starts to look smoother Months 2 to 6: Firmer look builds after repeated sessions Preparing for Your Microneedling Treatment Preparing for microneedling means keeping your skin calm and reducing infection risk. Most clinics ask you to pause harsh activities, avoid sunburn, and arrive with clean skin. A consult should also review your meds and your skin history. Preparation matters because “angry skin” tends to react more. Cosmopolitan’s 2025 report shows a shift away from aggressive routines and toward barrier-focused care, which aligns with how clinics approach pre-treatment preparation. A practical pre-visit checklist 3 to 5 days before: Pause retinoids and strong exfoliants unless your provider says otherwise. Avoid tanning and sunburn: Sun-stressed skin reacts more. Skip other aggressive treatments: No peels or lasers right before, unless planned by a clinician. Tell your provider if you have: active acne flare, eczema/psoriasis in the area, a history of keloids, or recent isotretinoin use. Essential Micro Needling Aftercare for Best Results Micro needling aftercare is about protecting the skin while the channels close and the barrier rebuilds. For the first 24 to 72 hours, keep products simple, avoid heat and heavy sweating, do not pick or scrub, and take sun protection seriously. Poor aftercare can erase your upside. It can also raise the risk of irritation, pigment issues, or infection. Recent media reports on adverse outcomes often tie back to poor technique, repeated passes, or weak safety standards. That is why clinic choice matters. The first 24 hours Cleanse with a gentle cleanser and lukewarm water. Use a bland moisturiser with barrier-support ingredients (ask your provider). Avoid makeup, gym sessions, hot yoga, saunas, and swimming. Days 2 to 7 Keep it simple: gentle cleanse, moisturise, sunscreen. Avoid retinoids, strong acids, and scrubs until your provider clears you. Do not pick dry flakes. Let them shed. Sun protection rules After microneedling, the skin is
Before and After Micro Needling Results in Vancouver
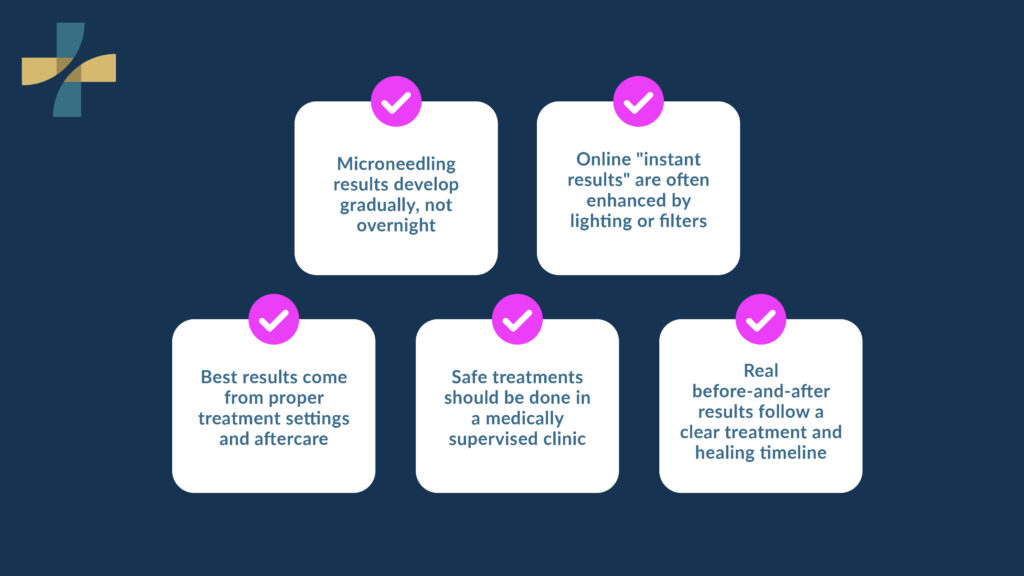
Micro Needling results are real, but they build over time. If you are seeing next-day transformations online, you are often seeing lighting, makeup, or filters. In the clinic, the best before-and-after results come from safe settings, the right plan, and good aftercare. There is also a reason this topic is trending right now. In a recent safety communication, the U.S. FDA addressed radiofrequency microneedling, noting reports of serious complications when devices are used in certain ways. The notice focused on device misuse and off-label application, not standard clinic-based microneedling performed under medical supervision. This guide explains what to expect before, during, and after a microneedling treatment, plus a realistic results timeline. It also explains why choosing a medically supervised clinic in Vancouver supports safer, more consistent skin rejuvenation outcomes. Understanding Micro Needling and Its Benefits Micro Needling is a minimally invasive treatment that creates tiny micro-channels in the skin to trigger healing. Over the next weeks, your body produces more collagen and elastin, which can smooth texture and improve tone. Most people need a series of sessions for visible, lasting change. What Micro Needling can help with Dermatology sources commonly list these concerns as microneedling targets: Acne scars and other mild scarring Fine lines and early wrinkles Enlarged pores and uneven texture Dark spots and uneven tone (including melasma in some cases) Stretch marks and crepey texture (body areas vary) A key message from the American Academy of Dermatology is that professional microneedling is designed to puncture skin, while many at-home devices are not meant to go as deep and may bring avoidable risks. Why “before and after” photos can look misleading Here are common reasons online photos look dramatic: Different lighting (window light vs overhead) Makeup or tinted sunscreen in the “after.” Swelling in the first 24 to 72 hours making skin look “plumper.” Angles and facial expression changes Filters or smoothing tools A more reliable way to judge results is to track your own skin in the same light, same time of day, same angle, once a week for 8 to 12 weeks. What “good” results usually look like In real clinic settings, most people notice: Skin feels smoother first (texture improves before pigment) Pores look less noticeable as collagen support improves Tone looks more even after a series, not after one session Scars soften gradually, not overnight Preparing Your Skin Before Microneedling in Vancouver The best way to improve your microneedling outcome is to prep your skin for 1 to 2 weeks and avoid irritation triggers. Your provider will screen for active acne, infection, cold sores, or meds that raise risk. A short prep plan also reduces post-treatment redness and patchiness. A simple 7 to 10-day pre-treatment checklist Use this as a general guide, then follow your provider’s instructions. Do: Use a gentle cleanser and plain moisturiser Wear broad-spectrum sunscreen daily Hydrate and sleep well for a few days before Tell your provider about cold sores, acne meds, and blood thinners Pause or avoid (often 3 to 7 days before, provider-dependent): Harsh exfoliants (strong acids, scrubs) Retinoids and strong “active” products if you get irritated easily Tanning and heavy sun exposure Waxing on the treatment area Who should delay treatment? Medical guidance commonly lists reasons to delay microneedling, such as: Active skin infection or inflamed breakouts Recent heavy sun exposure or sunburn A history of keloid scarring Certain immune issues or active cancer treatment in the area If you are unsure, a consultation matters. A top-rated microneedling specialist in Vancouver that patients trust should be willing to say “not yet” when your skin is not ready. What to Expect During the Procedure A microneedling treatment usually includes cleansing, numbing, controlled needling, and a calming finish. Most sessions take 15 to 60 minutes, depending on the area and device. You may feel heat or a scratchy sensation, especially on bony areas like cheekbones. H3: Step-by-step: what happens in the room A typical microneedling Vancouver appointment looks like this: Skin check and photos (often done for progress tracking) Cleanse and prep Topical numbing for comfort (often 30 to 45 minutes) Micro-needling pass using a pen or device with sterile tips Soothing products based on your plan Aftercare instructions and next-step scheduling Does it hurt? Most people describe micro-needling as tolerable when numbing cream is used. Without numbing, discomfort can increase, especially in sensitive areas like the forehead or cheekbones. Sensation varies based on needle depth, skin sensitivity, and treatment area. How long does it take? A micro needling session usually lasts between 15 minutes and one hour, depending on the size of the treatment area and needle depth. Face-only treatments are often shorter, while sessions that include the neck or other areas take longer. Immediate Aftercare and Recovery Tips Right after microneedling, redness and tightness are normal, and you need to protect the skin barrier. Most people look sunburnt for 1 to 2 days, and some stay red longer. Many providers advise waiting about 24 hours before makeup and staying out of direct sunlight while healing. A realistic recovery timeline (face) Here is what many people experience: Time after treatment What you may see What to do 0 to 24 hours Redness, warmth, mild swelling Gentle cleanse, plain moisturiser, no workouts for a day if you flush easily Day 2 to 3 Redness fades, skin feels tight Keep it simple, avoid active serums Day 3 to 5 Dryness or light flaking in some people Moisturise, do not pick or scrub Day 5 to 7 Skin looks calmer, tone begins to look fresher Resume basics, ask your provider when to restart activities Redness and mild swelling can last up to five days for some people, depending on skin sensitivity and treatment depth. What not to do right after treatment To reduce irritation and risk: Do not use strong acids, retinoids, or scrubs until cleared Do not pick flaking skin Avoid sauna, steam rooms, and heavy workouts if you swell easily Avoid unclean brushes or old